My 3 year old son only had one placemat, and no matter how much I tried to clean it, it always looked stained. I was thinking about how irritated my husband was going to be when I placed yet another Amazon order, and then it occurred to me that a placemat would be a fairly simple craft to do with my son. Check out this very simple, fun activity to do with your toddler.
1. First I gathered my supplies. These were all things that I already had around the house. We used a shirt box, wrapping paper, bulletin board letters, magazines, regular scotch tape, double sided scotch tape, and contact paper.
 |
| I purchased these letters at Target. They are very inexpensive and easy to use. |
 |
| I cut the bottom out of this shirt box. |
2. Next, I wrapped the bottom of the box in the wrapping paper.
 |
| I obviously have no wrapping skills, and this still turned out well! |
3. I decided that this would be a great opportunity for my son to practice spelling and recognizing his name. So I asked him for each letter of his name. He handed each letter to me as I asked for it. Then he added double stick tape to the back of each letter and laid it across the top of the placemat.
 |
My son found the letter that I asked for!
|
 |
He had fun using the double sided tape. I chose to use tape for this project so that we wouldn't have to worry about the glue bleeding. The tape worked really well for areas where my son placed pictures and letters and decided to move them later. It did not leave any marks behind on the paper.
|
4. After my son had his name down, I let him add pictures from magazines, and even some of his art work from earlier in the season. I cut out some pictures that I thought he would enjoy in advance. We have a pretty limited magazine selection in my home, but my son had a great time with the pictures I was able to find.
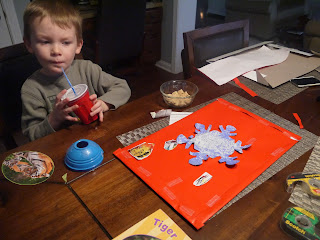 |
My son enjoyed adding his snowflake from school to the mat.
|
 |
My son had fun looking through the pictures to choose what he wanted.
|
5. I covered the mat in contact paper. I did this while my son was sleeping, because I hadn't used contact paper in a while. You might actually want the extra set of hands to keep the contact paper flat, as mine buckled a little bit while I was wrapping the mat. (I forgot to take pictures!)
6. Use the placemat at meal time. It could also be used underneath clay or paint during craft time.
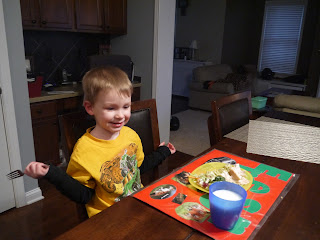 |
My son loved eating dinner on his creation! Now he wants to make one for mom and dad.
|
This was a really fun successful craft, and we even got a little letter practice in!


No comments:
Post a Comment